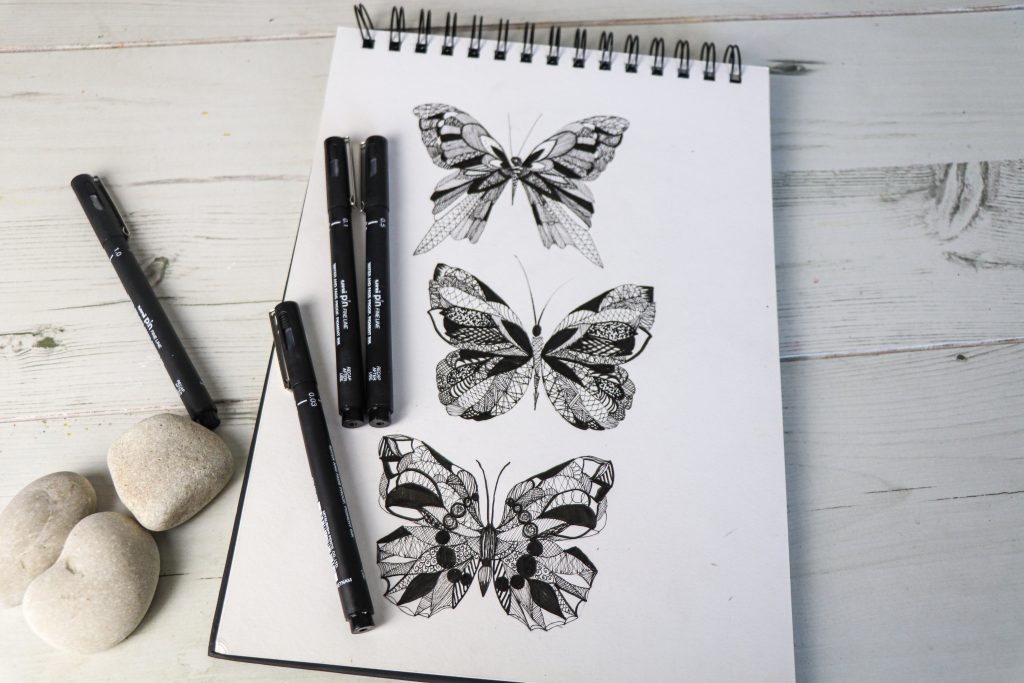
If you’re looking for a fun creative project, why not give this a go? By using the various uni-PIN pen sizes you can create a series intricate butterfly designs by making different lines and strokes to achieve different looks. The detailed nature of this activity will also be a great way to practice a some mindful drawing, helping to improve your health and well-being.
Did you know that drawing is good for you? The process hones personal development and problem-solving skills, it releases endorphin and aids in relaxation and stress relief. Also, we we actively use both sides of our brain when drawing, the right for creativity, and the left for logical thinking, this helps develop the ability to focus and think strategically.
With this zentangle-inspired project we give you a free template to use with there different butterfly shades. Our step by step will give you some mark-making ideas to get started but you can let your creativity go wild with your PIN pens.
uni-PIN pen, the first choice of for professionals
Whether you’re a part-time doodler, dedicated artist, devoted designer or simply want to perfect your hand lettering, a uni-PIN pen is the perfect tool for you.
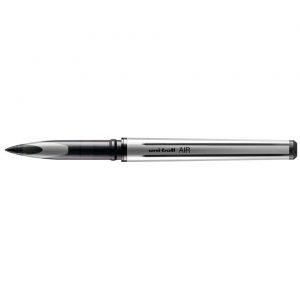
The uni-ball PIN is the pros choice. An excellent value drawing and writing pen, it contains fade proof and water resistant Super Ink – great for when you need your creations to last.
Its solid pigment ink line is clear, clean and precise, which is why the PIN is loved by professional artists and illustrators, graphic artists, architects and amateur hobbyists alike. Ink is water resistant too so the pens be used with watercolour as the ink will not smudge when wet.
Its choice of 14 black PIN nib sizes from delicate 0.03 to a heavy 1.2 (including an expressive brush tip), means you can create several line widths with your PIN. This enables you to master a range of techniques including fine line drawing and hand lettering. PIN’s brush tip is firm, so it adapts to your pressure, angle or speed of writing. This firmness gives you excellent control, giving you the power to truly master brush script and expressive brush pen painting techniques.
This project makes the most of this variation in nib sizes and really allows the excellent black pigment to sing, so why not try this drawing project yourself this up-coming weekend?
1: Intricate Butterflies shopping list
To create your intricate butterfly illustration you will need the following
1: Artgecko Splashy Gecko sketchbook
2: Uni-PIN pens 0.05, 0.1. 0.3. 0.5, 1.0 and brush
3: Uni-ball Gel Grip pen
4: Kuru Toga Pencil
5: Tracing paper
6: Downloadable template, to download simply open the below image in a new tab, right click to save and print out.
![]()
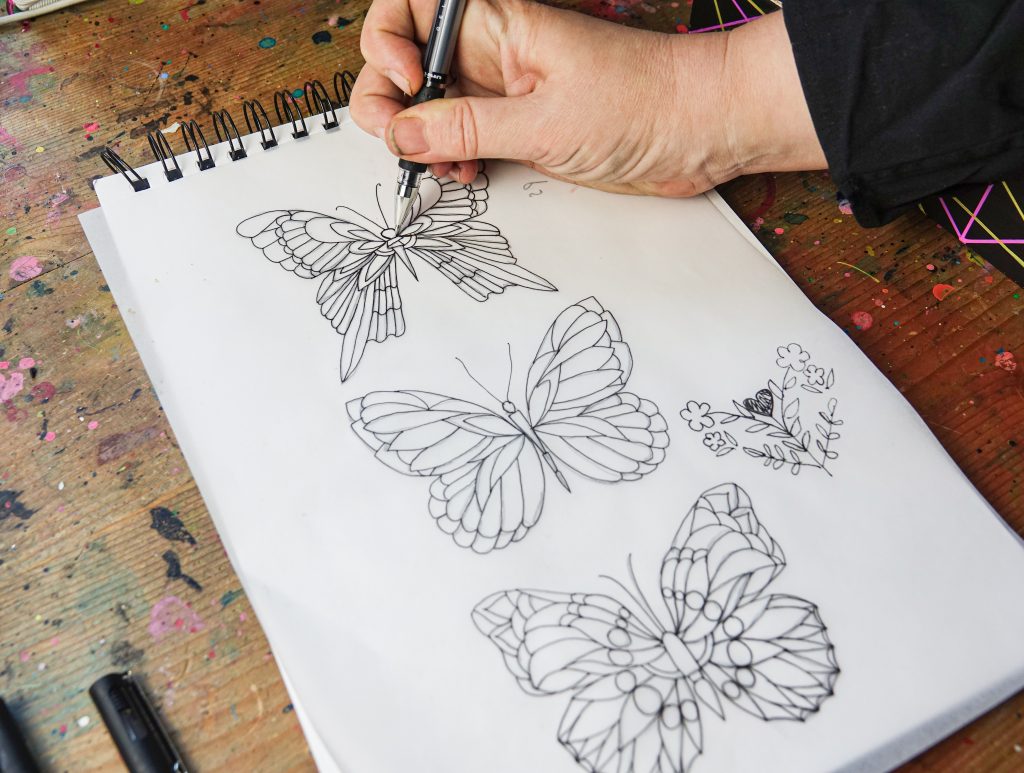
2: Trace and transfer
You can print out your template directly onto tracing paper or use this template to trace from. Do this by placing the template on a flat, smooth surface. Lay the tracing paper over it and fix with the tape. Trace the picture with a 0.5 PIN pen. Once you have finished, remove the template from underneath the tracing paper.
Which ever way you have placed your image on the tracing paper, turn the tracing paper over so the image is face down. Apply your Kuro toga pencil to the back of your drawing. Move your pencil lead back and forth to create an even surface. To transfer your drawing, place the tracing paper gently on top of your sketchbook paper with the pencil stroke side face down. Trace the image, by going over the lines using a the Gel Grip pen, with pressure, onto the card. Lift up the tracing paper to reveal the image.
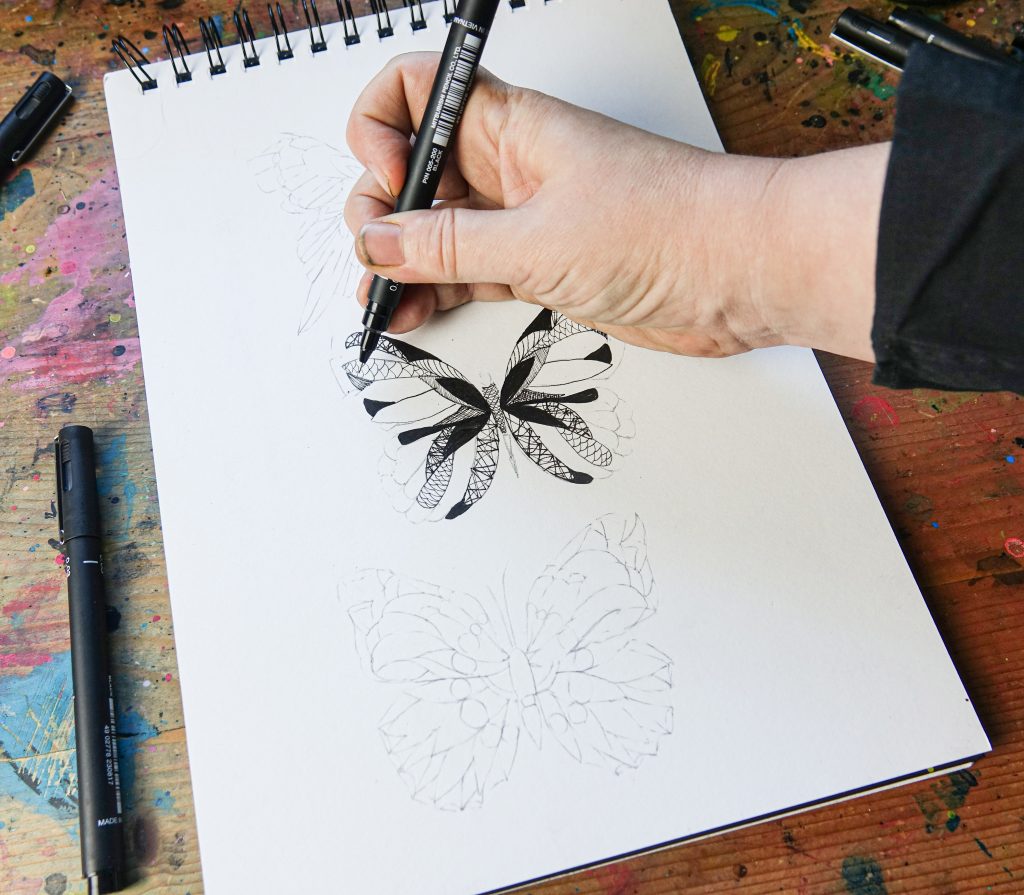
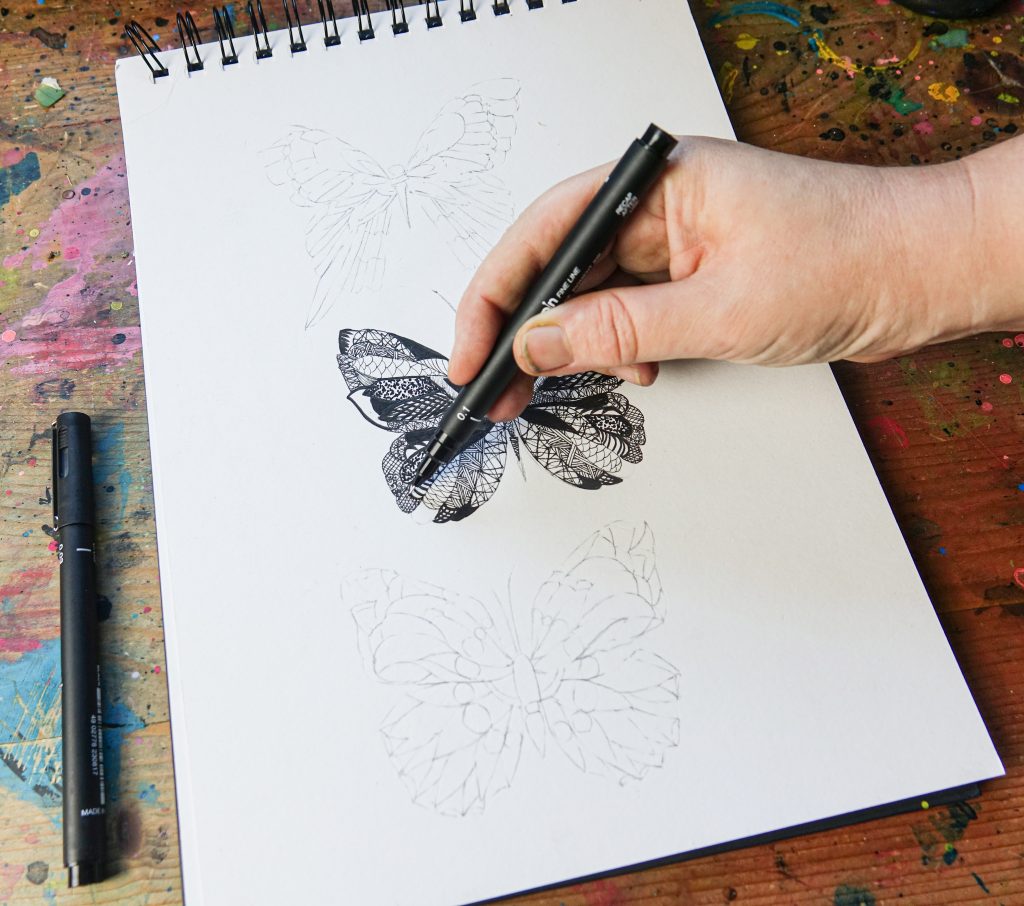
3: Start working on your PIN pen design
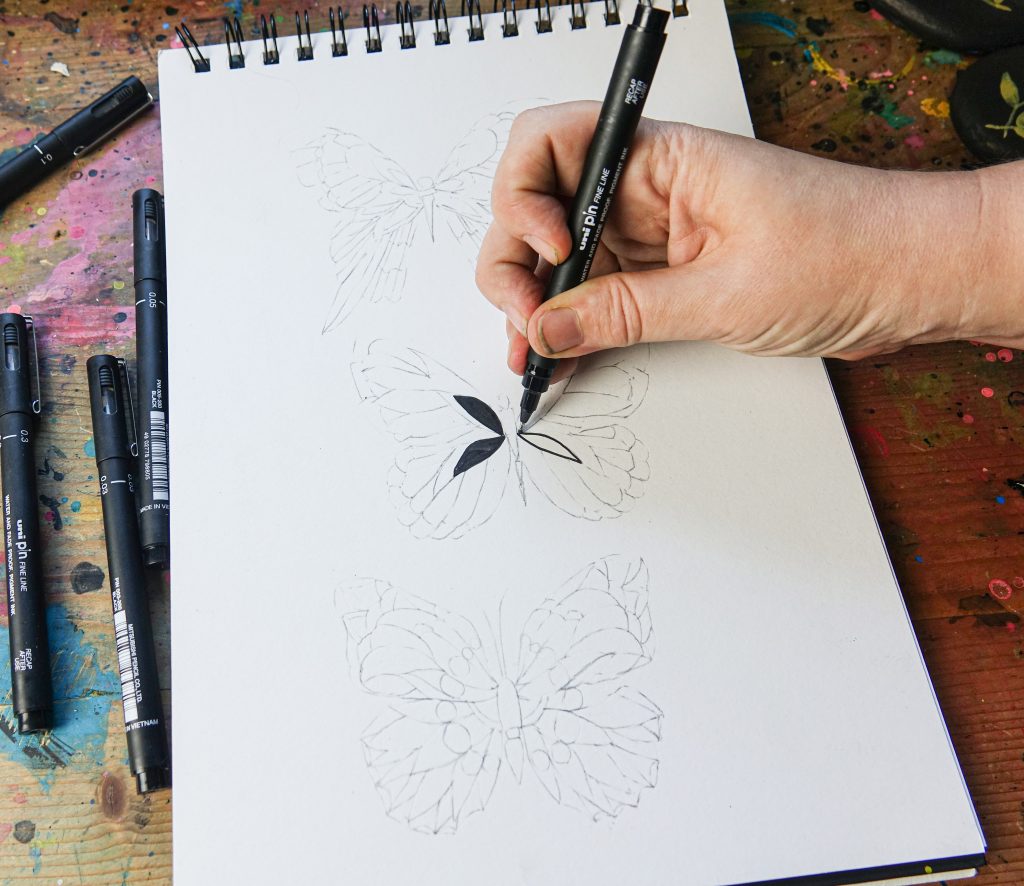
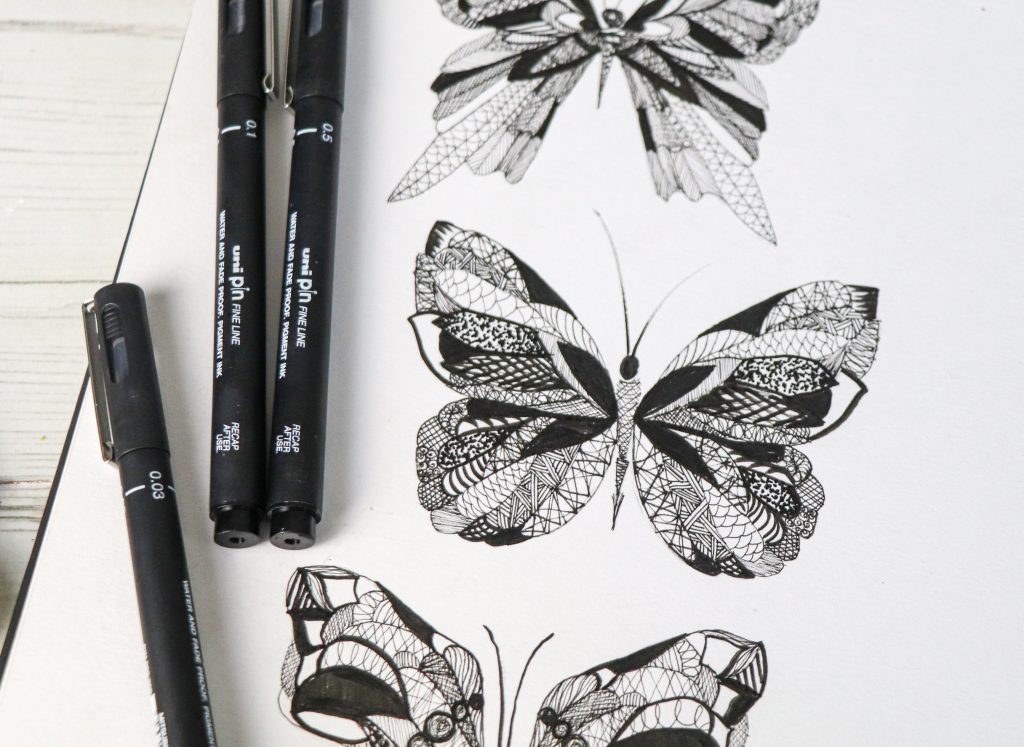
As you can see the butterfly shapes are divided into sections for you to till in with decorative line effects and shading. The best way to anchor a design such as this is to fill in the dense areas of colour coverage first to give your illustration some structure. We used a 0.5 PIN pen here for an even line and solid colour coverage. We then used our 0.3 PIN to make cross hatched shading and curved lines in another section to add shape and contrasting textures to the centre of our butterfly.
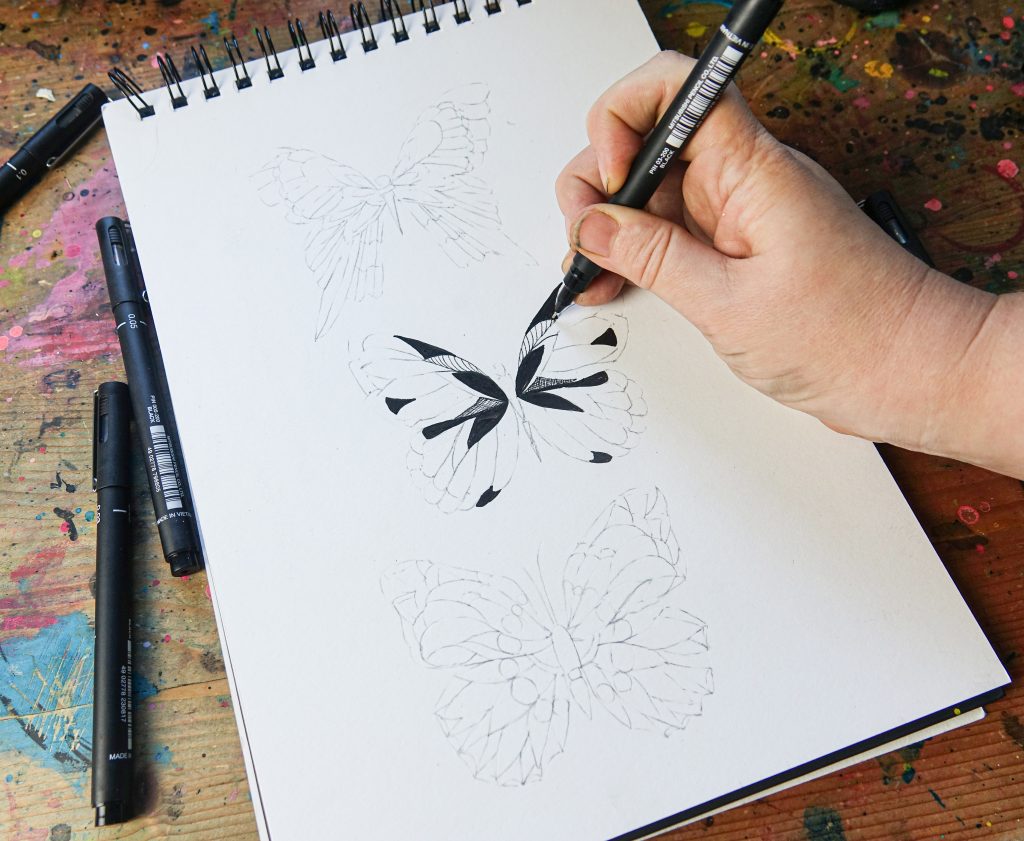
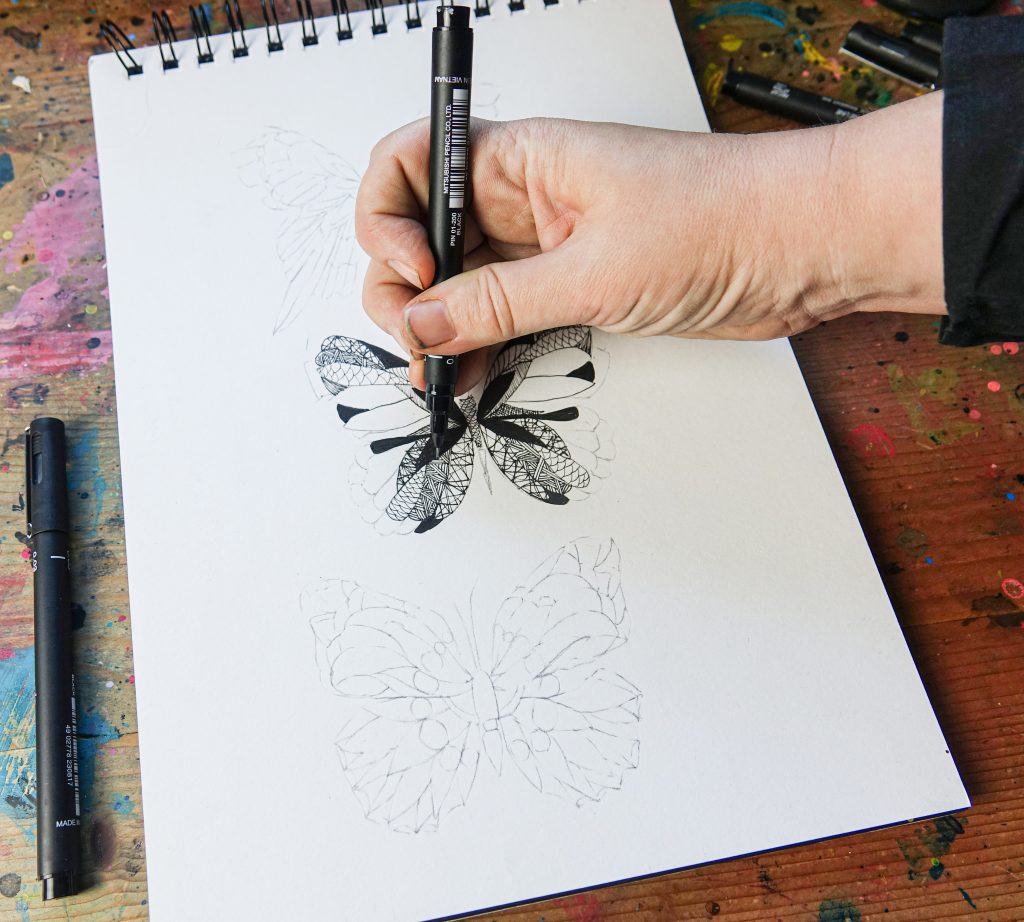
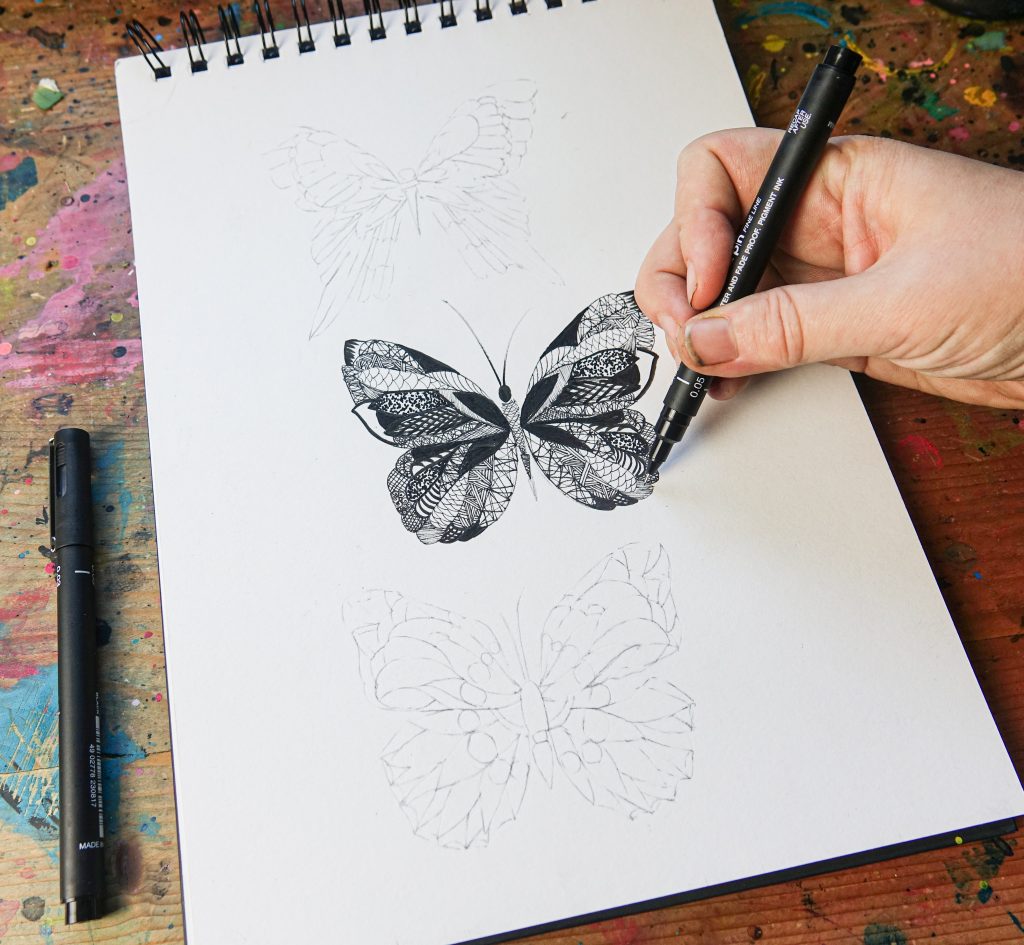
4: Practice shading and shaping techniques with PIN pen
You can make so many effective marks with the uni-PIN pen. What we love about this project is, because you have a simple template to fill in, you can explore a variation of shading and shaping techniques within a contained design. This means whatever you end up doing, the illustration should still look cohesive and professional. Above we used our 0.1 pen to make overlapping jagged lines for a strong graphic shading. We then used the same nib size to make smooth lines for a delicate shading effect around the central wings. We also used the fine 0.1mm nib to draw an overlapping curved lines in the centre of the butterfly’s body and made a more linear scallop scale design in some of the wing sections.
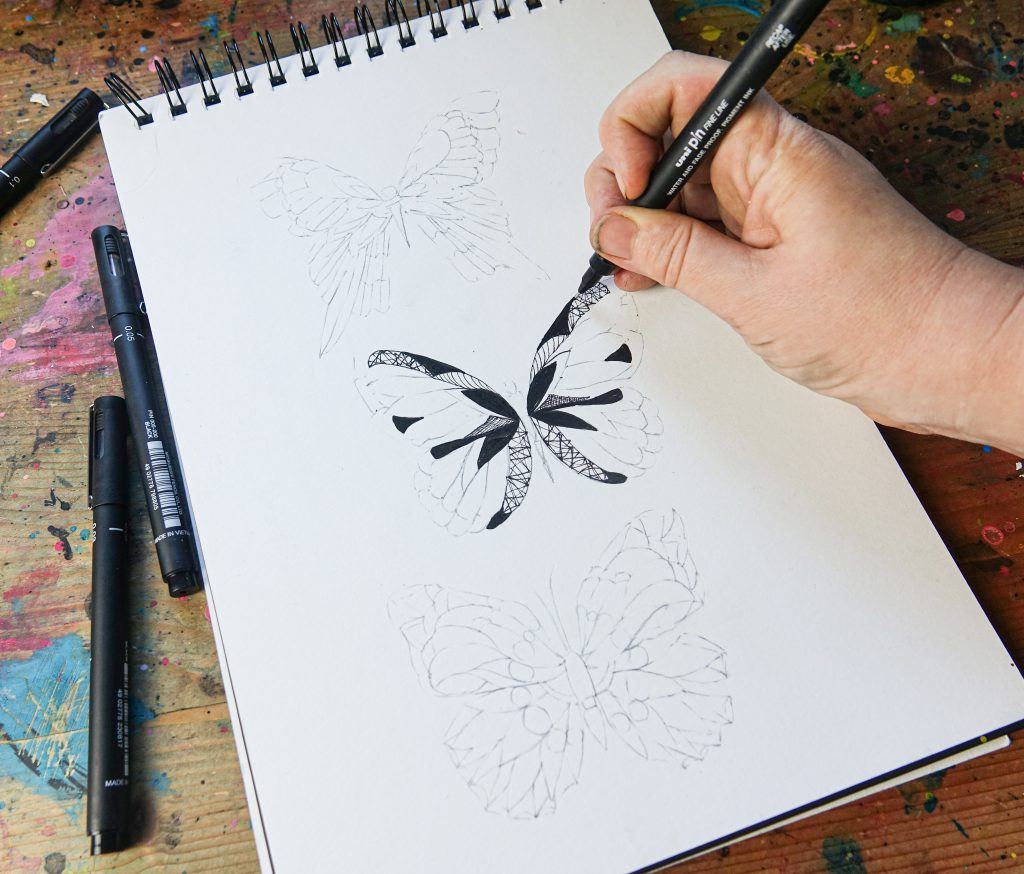
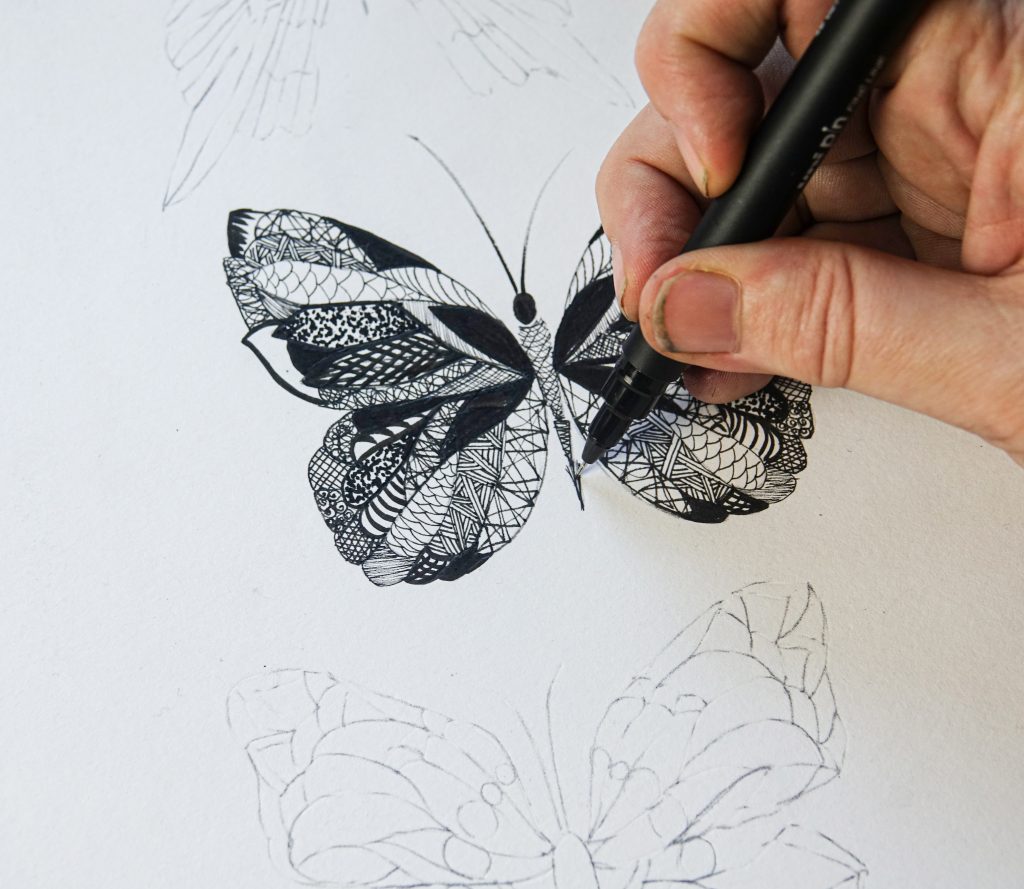
5: Be playful and experiment with your PIN pens
Play with each section and experiment with various line techniques. One really lovely effect is to play with the direction of your lines to fill-in an area. Simply use your 0.1 nib to make three lines in one direction and connect with three lines drawn in the opposite way, continue with this until you fill in the entire section.
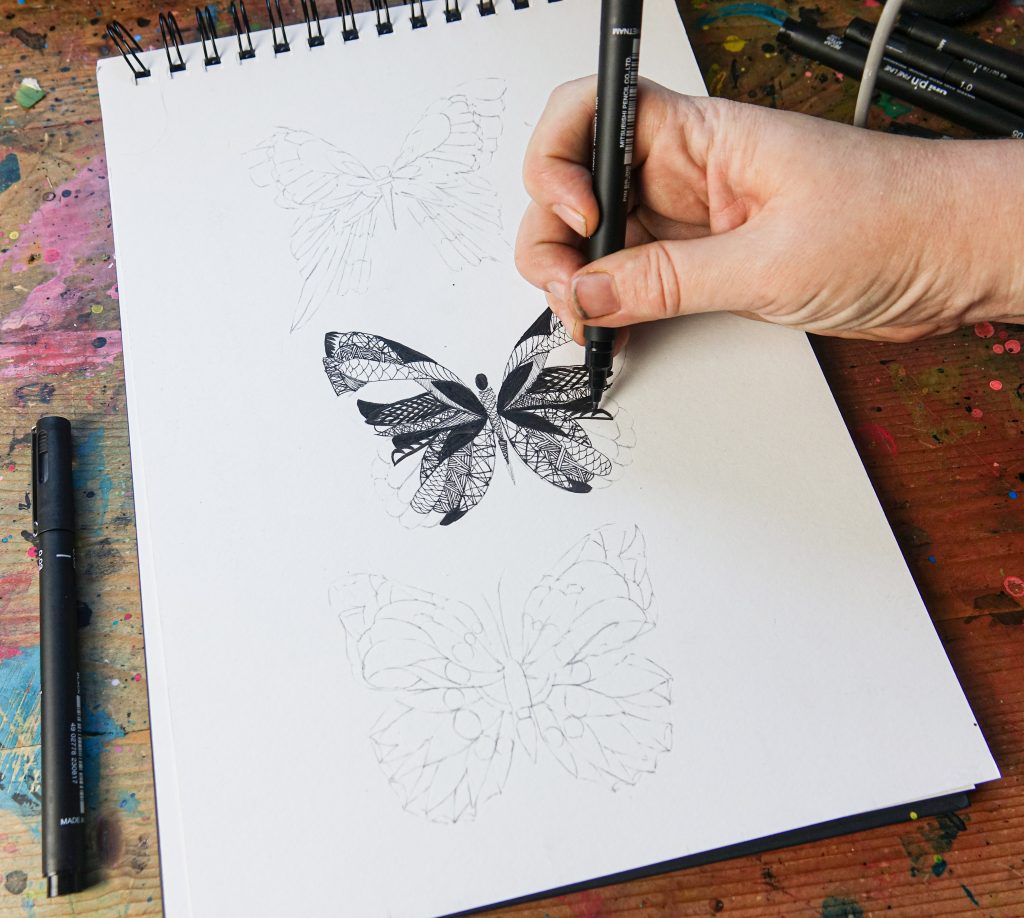
Now grab your brush tip and see what lines you can make with that. We’ve coloured in the head and made simple brush strokes at the top tips of the wings, criss-crossed one section to create a ‘net’ design, then made curved strokes in another section as you can see above. You can also use the brush nib to draw expressive antenna by holding the tip at an angle and making two loose curved strokes from the top of the head.
Now try your big and bold 1.0 pen for size. We’ve used it to make dots, robust outlines and curves on our butterfly, what will you do with yours?
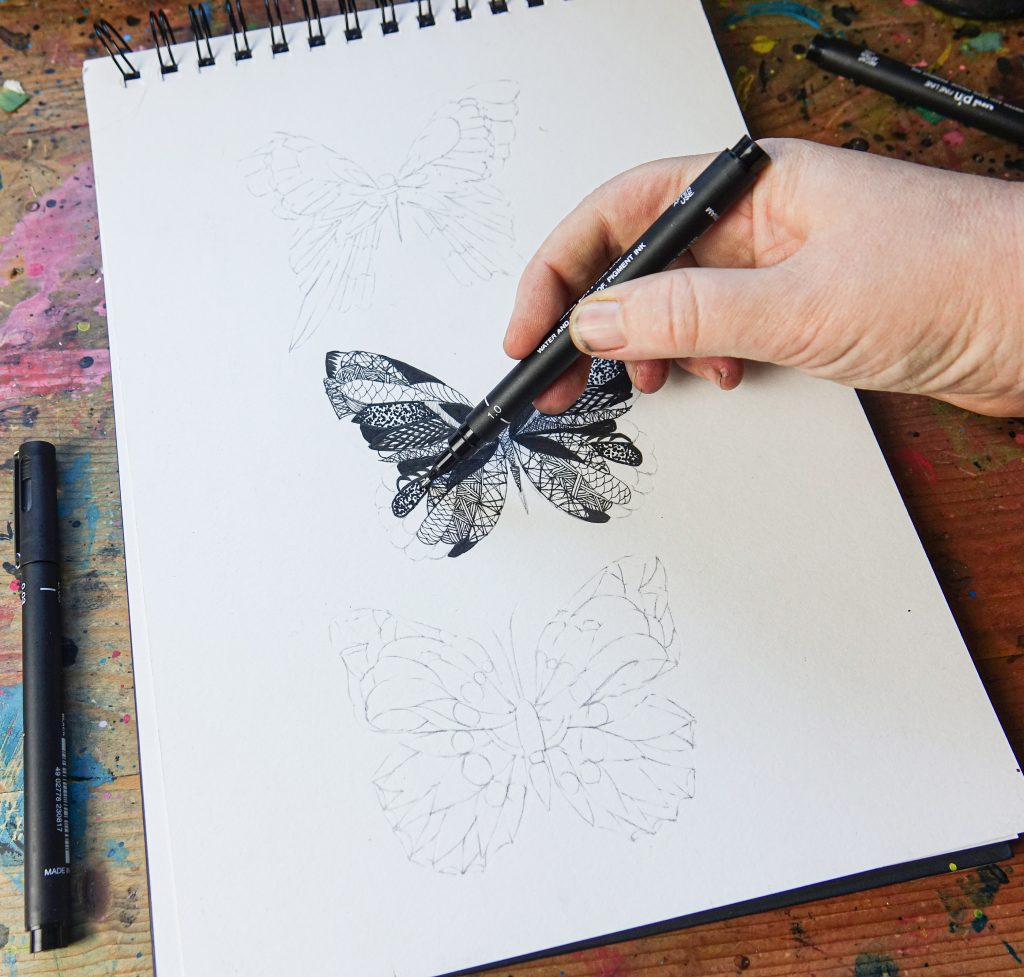
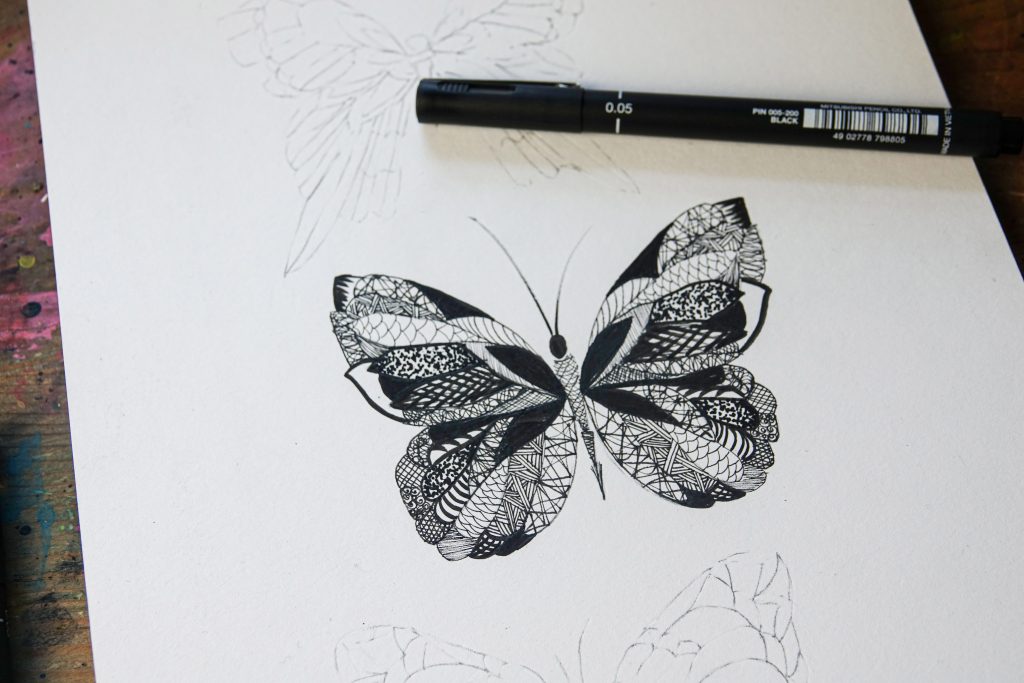
6: Add final shading with smaller PIN pen nibs
Once you’re happy with most of your sections, you may want to fill in the smaller areas with simple shading. You can use your 0.1 nib to make very tight cross-hatched sections as seen above for light, textural shading. Or you can employ a light pressure to free-shade sections using your 0.05 PIN pen.
Use your fine line pens to make simple strokes to finish the butterfly body.
And there you have it, a completed intricate butterfly design using uni-PIN pens.
So try out your mark making skills using your PIN pens on all three shapes.